Leave Your Vacation Rental Management to Us
Free Online ConsultationWhy Vacation Rental Photos Make or Break Your Bookings
Vacation rental photos are the single most important factor determining booking success. According to Airbnb’s official data, listings featuring professionally photographed images see booking rates improve by up to 40% compared to listings without them. When travelers choose accommodation, the first thing they see isn’t text information—it’s photos. A property’s first impression is said to be formed in just three seconds, and whether you can make guests think “I want to stay here” within that brief window determines whether you win the booking.
In fact, vacation rental booking platforms are designed to display thumbnail photos prominently in search results. When properties in the same area and price range appear side by side, guests click on the listing with the most appealing photos. In other words, no matter how great the location or amenities are, if the photo quality is poor, guests won’t even open the property page to begin with. Investing in photography is a more cost-effective customer acquisition strategy than spending on advertising.
The Impact of Visual Information on Booking Behavior
The human brain is said to obtain approximately 90% of its information visually, and research shows that images are processed 60,000 times faster than text. This is clearly reflected in vacation rental booking behavior—a Booking.com survey found that properties with fewer than 5 photos receive click-through rates roughly one-third of those with 25 or more photos. Guests compare multiple photos to comprehensively judge room size, cleanliness, and atmosphere.
Photo quality also indirectly affects review ratings. Properties that set appropriate expectations through photos tend to receive positive comments like “it was exactly as pictured,” while photos that make a space look better than it actually is invite disappointed low ratings. Striking the right balance between accuracy and appeal is directly linked to earning repeat guests and high review scores.
Standing Out From Competing Properties
In popular urban areas, it’s not uncommon for dozens of vacation rental properties to cluster around a single train station. When properties have similar layouts and amenities, guests’ selection criteria skew heavily toward photo quality and atmosphere. For example, even for the same 1LDK unit, there are reported cases where bright photos utilizing natural light achieve click-through rates more than double those of dark photos taken on a smartphone under fluorescent lighting.
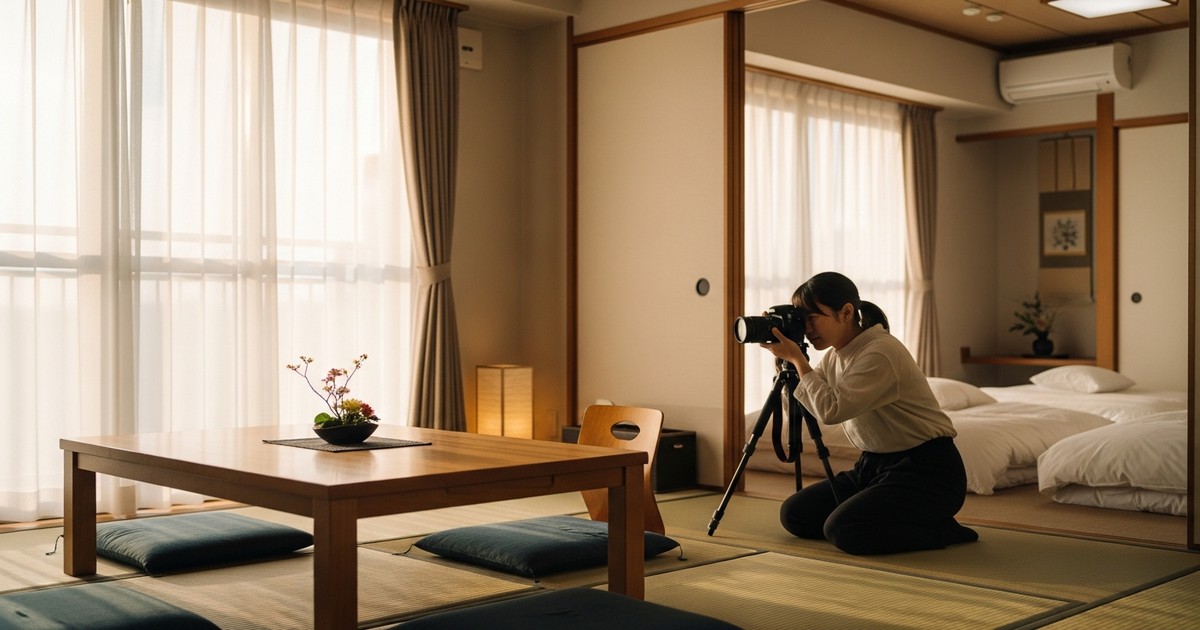
To stand out, it’s effective to clearly convey your property’s unique features through photos. If a unit has a Japanese-style tatami room, shoot from an angle that showcases the texture of the tatami; if a unit has a great view, incorporate the scenery through the window into the composition. Visually emphasizing elements that are “unique to this property” is what creates differentiation from competitors.
3 Things to Prepare Before Your Photo Shoot
Great photos are determined not on the day of shooting, but during the preparation stage beforehand. Whether you hire a professional photographer or shoot the photos yourself, the quality of your preparation directly translates into the quality of your photos. Here we explain three preparation tasks you must complete before shooting begins.
Thorough Cleaning and Organization
The most fundamental preparation for a photo shoot is thoroughly cleaning the entire property. Even dirt that’s barely noticeable to the naked eye will be mercilessly picked up by the camera lens. Water stains around plumbing fixtures, fogged mirrors, fingerprints on window glass, and dust in floor corners are especially prone to showing up in photos, so these areas need more careful attention than your regular cleaning routine. Buff the kitchen sink dry until it shines, and aim to make the toilet and bathroom look close to brand new.
When it comes to organizing, aim for a balance that removes signs of everyday living while avoiding the look of an “unoccupied showroom.” Specifically, temporarily put away everyday items like remote controls and tissue boxes, and leave only small decorative touches that convey “lived-in comfort”—such as coffee cups, houseplants, or neatly folded towels. Also check that the contents of storage shelves aren’t visible within the shooting frame.
Styling and Prop Placement
Think of hotel room photography as your reference point—the beauty of the bed-making and the placement of cushions alone can dramatically change a photo’s impression. Lay wrinkle-free sheets on the bed and arrange pillows symmetrically. Placing two or three accent-colored cushions on a sofa creates depth and a stylish feel in the space. In terms of cost, simply assembling a set of styling props for around ¥3,000–5,000 can significantly improve photo quality.
Setting placemats and tableware on the dining table evokes the image of “you can enjoy meals here,” and beautifully arranging rolled-up towels and amenities in the bathroom helps guests picture themselves actually staying there. However, too many props will make the space look cluttered with everyday items, so aim for no more than three items per spot.
Choosing the Right Time of Day
Lighting is the single most influential factor in indoor photo quality. The optimal shooting time varies depending on which direction the windows face. For east-facing windows, 8–10 AM is ideal; for south-facing windows, 10 AM–2 PM; and for west-facing windows, 3–5 PM—these are the golden hours when soft natural light streams into the room. North-facing rooms receive little direct sunlight, so shooting on a cloudy day can actually work in your favor by providing more even lighting.
On clear, sunny days, light can be too strong, causing areas near windows to blow out while the back of the room falls into shadow—creating an unwanted “high contrast” effect—which is why slightly overcast days are considered best. If you must shoot on a sunny day, closing sheer curtains to diffuse the light is an effective technique. Nighttime shooting offers the advantage of showcasing lighting fixtures, but tends to create a darker impression, so it’s best used as supplementary photography only.
Composition and Angle Fundamentals to Keep in Mind While Shooting
Once preparations are complete, it’s time to shoot. What matters here isn’t just “what to shoot” but the technique of “how to shoot it”—composition and angle. The biggest difference between professional and amateur photos comes down to skill in composition.
Wide Angles That Make Rooms Look Spacious
When photographing vacation rental properties, you need to convey room size both accurately and attractively. The basic technique is to shoot diagonally from a corner of the room. This composition captures two walls plus the floor and ceiling, maximizing the sense of depth and spaciousness. The standard shooting height is chest level (approximately 100–120 cm from the floor)—shooting lower makes the ceiling appear larger and the room look bigger than it is, while shooting higher emphasizes the floor area.
When shooting with a smartphone, using wide-angle mode (0.5x) is recommended. However, because wide-angle lenses distort the edges of a room unnaturally, applying distortion correction afterward is advisable. For DSLR or mirrorless cameras, a focal length of 16–24mm (full-frame equivalent) is the standard for real estate and vacation rental photography. Excessive wide-angle shooting creates a gap between the photo and reality, so maintaining a realistic sense of scale is key to earning guest trust.
Level and Straight Lines for a Stable, Polished Look
The most noticeable mistake in amateur photography is tilted horizontal or vertical lines. When walls, pillars, or door frames appear crooked, it unconsciously gives an impression of “instability” or “sloppiness.” Ideally, use a tripod to keep the camera level, but if shooting handheld, turn on your smartphone’s grid display feature and align the vertical lines of the building with the guidelines.
You can also apply horizontal/vertical correction using editing software after shooting (including free apps like Lightroom or Snapseed), but the more correction you apply, the more the image gets cropped and loses resolution. Getting your horizontals and verticals as straight as possible at the time of shooting minimizes editing effort and preserves image quality.
The Optimal Number of Shots Per Room
Airbnb allows up to 100 photo uploads, but the recommended number is around 20–30. As a general guideline, aim for: 3–5 photos of the living room, 2–3 per bedroom, 2–3 of the kitchen, 2 of the bathroom, 1 of the toilet, 1–2 exterior shots, 2–3 of the surrounding area, and 3–5 of other amenities (washing machine, amenities, etc.). Shooting the same room from different angles helps guests better grasp the overall space.
Particularly important is your first photo—the cover photo (thumbnail). Since this single image determines your click-through rate, choose the most beautiful angle of your property’s most appealing space. Generally, a full view of the living room tends to achieve the highest click-through rate, but if you have a distinctive Japanese-style room or a designer bathroom, that may be more effective instead.
Post-Shoot Editing and Listing Considerations
Editing after the shoot is an essential process for elevating photo quality another notch. However, excessive editing can backfire, so aim for adjustments within an appropriate range.
Basic Brightness and Color Adjustments
Photos straight out of the camera often appear darker than the space actually looks, so brightness adjustment is essential. In Adobe Lightroom, simply raising “Exposure” by about +0.3 to +0.7 and lifting “Shadows” by +20 to +40 can make an interior look brighter and more natural. With free smartphone apps, Snapseed’s “Tune Image” feature allows for similar adjustments.
For color tone, shifting slightly toward warmer hues can create a cozy, inviting impression, but overdoing it results in an unnatural orange cast. Setting the white balance to a color temperature of around 5,500K–6,000K is a good benchmark. Also avoid pushing saturation to extremes—photos that diverge too much from reality increase the risk of reviews saying “it didn’t look like the photos.”
Cost and Benefits of Hiring a Professional
If you feel you’ve reached the limits of DIY photography, consider hiring a professional photographer. Photographers specializing in vacation rentals and real estate typically charge ¥15,000–40,000 per property. Shooting usually takes 1–2 hours, with 20–40 finished photos delivered. Crowdsourcing platforms sometimes offer rates around ¥10,000, but it’s important to choose a photographer with vacation rental photography experience.
From a cost-benefit perspective, even if professional photos only increase monthly bookings by 2–3 reservations, that translates to an extra ¥16,000–24,000 in monthly revenue for a property priced at ¥8,000/night—meaning the photography cost pays for itself within 1–2 months. Airbnb has, at times, offered free professional photography through its host program, and discounted photography offers still occasionally appear depending on the region, so keep an eye out for notifications from the platform.
Supplementary Strategies to Boost Bookings Beyond Photos
While improving photo quality is the top priority for attracting bookings, photos alone don’t tell the whole story. Let’s also look at strategies that create a synergistic effect when combined with great photos.
Writing Listing Copy That Complements Your Photos
By organizing what information you want to convey through photos versus what to supplement through text, you can precisely control guests’ understanding and expectations. For example, if you post a wide-angle photo of the living room, add text noting “The living room is approximately 20 square meters, comfortably accommodating up to 6 guests.” Supplementing information that’s hard to convey through photos alone—such as distance from the station, building age, or soundproofing—helps ease pre-booking concerns and improves conversion rates.
Captions (photo descriptions) are another valuable tool. Adding sensory language like “Living room bathed in bright natural sunlight” or “Bathroom with the soothing scent of hinoki cypress” helps guests’ imagination flourish about their upcoming stay. Captions don’t need to be added to every photo, but it’s effective to include them on your 5–10 most important shots.
Regular Photo Updates and Seasonal Adjustments
Rather than using the same photos indefinitely, swapping them out seasonally helps keep your listing feeling fresh. Photos with seasonal flair—like a window view of cherry blossoms in spring, cool and refreshing interiors in summer, an exterior shot with autumn foliage in the background, or a kotatsu or fireplace in winter—can boost booking intent. Airbnb’s algorithm is also said to take listing update frequency into account, so refreshing your photos may even have a positive effect on your search ranking.
Also, be sure to update your photos promptly whenever you replace furniture or interior decor. If outdated photos remain listed, guests may feel upon arrival that “this doesn’t match the photos,” which can lead to negative reviews. Maintaining photo accuracy is one of the most fundamental building blocks of trust for long-term booking success.
Have Vacation Rental Management Concerns? Consult Stay Buddy Inc.
If you find yourself thinking “arranging a photo shoot feels like too much hassle,” “I got photos taken but bookings still aren’t increasing,” or “I don’t even know where to start,” feel free to reach out to Stay Buddy Inc., your vacation rental management partner. From arranging photo shoots to listing optimization, pricing strategy, and guest communication, we provide one-stop support for everything your vacation rental business needs.
At Stay Buddy Inc., we provide photography direction tailored to each property’s unique characteristics, along with listing improvement recommendations based on booking data. Beyond simply improving photo quality, our strength lies in comprehensive management support aimed at maximizing occupancy rates and revenue.
We’ve supported property owners across a wide range of situations—from those just beginning to consider launching a vacation rental to those already operating but struggling to see results. Feel free to reach out even if you’d just like to share your current situation with us to start.